Wednesday, August 21, 2019

Terraform setting up clustered web server !! Getting Started Part-3!!

Last two posts first we saw the basics of terraform "Part-1" and then created simple web server "Part-2". 

Now as we know that running single web server in production is never a good idea. We always need services which should be highly available as well as should be scalable as per the requirements.

Creating and managing a cluster always going to be a pain point. Fortunately  with new cloud technologies now its possible to automate all this and things will be much easier to manage. In this tutorial we'll use AWS's "Auto Scaling Group (ASG)".

    An ASG takes care of everything automatically, including launching a cluster of EC2 instances , monitoring the health of each instance, replacing the failed instances and adjusting the size of cluster in response to the load.


A full working ASG stack include multiple resources to make a working cluster. It starts with "launch configuration" which basically specify how a particular EC2 instance will be configured.

Now, in Fig-1, you saw that we have two EC2 instances and each instance will be having its own IP address. Problem is that what will be end point that you will be provide to your users. Also, later on what we had some issue issues with any of the server ASG can destroy the faulty server and launch a server with new IP. It will be difficult to handle such a situation.

     One way to solve this issue is to use Load Balancer to distribute traffic to backend servers and give LB IP intact DNS to all the users to access the services. 


AWS offers three type of Load Balancers-

  1.) Application Load balancer(ALB) :
         Best suited for load balancing of HTTP and HTTPS traffic. Operates at the application layer (Layer 7) of the OSI model.
  
  2.) Network Load Balancer(NLB) :
         Best suited for load balancing of TCP, UDP and TLS traffic. Operates at the transport layer (Layer 4) of the OSI model.

  3.) Classic Load Balancer(CLB) :
         This is legacy load balancer that predates both ALB and NLB. It can handle all types of traffic that ALB and NLB can handle.

Now a days most of the application either use ALB or NLB. In our case we are going to handle HTTP traffic, so we will use ALB.

Again, ALB consists of several parts:

1.) Listener - listen on specific port and protocol.
2.) Listener Rule - takes request that comes to listener and send those that match specific paths e.g. /foo or /bar to specific target group.
3.) Target Groups - One of more servers that receive requests from the load balancer. Target group also perform health checks on those servers and only sends requests to the healthy servers.


You can get the code from my GitHub repo here.

Please see all the steps in below screen shots -


Check the status on your aws console and access site from browser as well :


Now, lets destroy whole the whole setup with one command :).


Sunday, August 11, 2019

Terraform setting up simple web server !! Getting Started Part-2!!


In our last post "Getting started with terraform", we just learn how to launch a simple EC2 instance in AWS. In this article we will dig more and will try to create a simple web server and try to access that.

Architecture -


We are not installing proper web-server, its just a hack. Using busybody to launch http process.

#!/bin/bash
echo "Hello, World" > index.html
nohup busybox httpd -f -p 8080 &
resource "aws_instance" "example" {
  ami                    = "ami-0cfee17793b08a293"
  instance_type          = "t2.micro"

  user_data = << - EOF  // Together<-eof code="">
              #!/bin/bash
              echo "Hello, World" > index.html
              nohup busybox httpd -f -p 8080 &
              EOF

  tags = {
    Name = "terraform-example"
  }
}

The << - EOF (together)<-eof span=""><-eof span=""> and EOF are Terraform’s heredoc syntax, which allows us to create multiline strings without having to insert newline characters all over the place.

We need to do some more changes before making this to work. By default aws deny all incoming and outgoing traffic from any EC2 instance. So, to allow http traffic on the web server we need to add a rule which will allow traffic on port 8080.

For this we will create a security group as below :

resource "aws_security_group" "example-ec2-sg" { 
  name = "terraform-example-instance"    // Name of the security Group

  ingress {
    from_port   = 8080
    to_port     = 8080
    protocol    = "tcp"
    cidr_blocks = ["0.0.0.0/0"]. // Allow from everything
  }
}
Creating this new security group will not be enough, until we configure our EC2 instance to use this security group. To do that we should be aware of terraform expressions.

An expression in terraform is something which return values. Terraform support number of expressions, but here we will use the type of reference  which allow us to access the values from other code. Here we need  the ID of the security group in EC2 configuration. For this format will be something like below-

_..
e.g. aws_security_group.example-ec2-sg.id

 Now use this security group ID in "vpc_security_group_ids" argument of aws_instance. So the final terraform file will be as below -


Now, lets go ahead and apply these changes. This will replace existing server and create NSG and associate that with new EC2.

Output of $terraform apply

Lets check aws console, grab Public IP and try to access web server either via browser or cli(curl e.g)-


Thats all for this post. Later we will see how to use variables (Input and Output) to make it more generic and setup cluster on webservers.

Friday, August 9, 2019

Getting started with terraform

What is Terraform -


                               Ok, so Terraform is Open-Source Infrastructure-as-Code(IAC) software tool which created by HashiCrop. The idea behind IAC is to define, deploy, update and destroy your infrastructure without any much difficulties. The main idea behind this is to treat everything as a code. No matter what it is. 

In this article, I am going in deep to explain about the software and compare this with other lots of available tool sets which together can be replaced this e.g. ansible, chef, puppet, salt, CloudFormation, ARM etc. 

In this specific article, I'll just show how easily we can launch a basic EC2 instance with a small code set. Terraform is simple binary which you can download and put that in your path. 

Below is the main architecture diagram which we are going to simulate.


Provisioning tools can be used with your cloud provider to create servers, databases, load balancers, and all other parts of your infrastructure.


Create a file "main.tf" where tf stands for teffaform. Add below code snippet to this file.


Set up your AWS credentials. Here for just testing you can set below variable with you AWS access and secret keys. There are other better ways to handle your credentials, but here I am just using these variable for testing.

$ export AWS_ACCESS_KEY_ID=(your access key id)
$ export AWS_SECRET_ACCESS_KEY=(your secret access key)


Next, step is to initialise the terraform, using $terraform init, reason for doing this is because when you specify the provider on the first line, terraform was not having specific plugins to do his job. So after this command it will actually generate a ".terraform" directory with all the required plugin for mentioned provider.

Output -


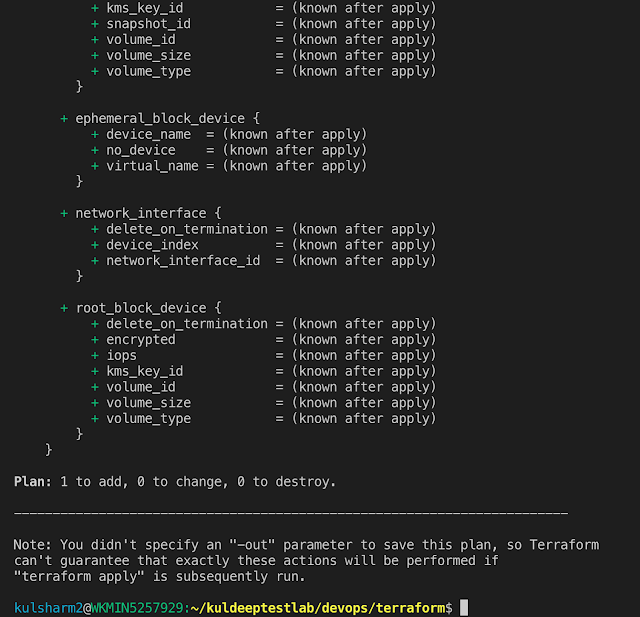
Next is to check if everything is correct before implementing the changes. You can use "$terraform plan" to check this as below:


Finally, Let apply these changes to launch the EC2 instance in AWS.

 Check AWS console for the instance availability:


Kubernetes 1.31 || Testing the Image Volume mount feature using Minikube

With Kubernetes new version 1.31 ( https://kubernetes.io/blog/2024/08/13/kubernetes-v1-31-release/ ) there are so many features releases for...